Bench Center
Request a Quote
The bench center is chiefly used to inspect the circular runout of the shaft parts and plate-like parts. It is unique in design, elegant in appearance. Additionally, this measuring equipment features high precision, and can be conveniently used.
Ⅰ. Measuring Instrument
- Deflection Tester
- Dial Indicator or Dial Gauge
- Lever Indicator
Ⅱ. Measurement Procedure
- Radial Run-out Management
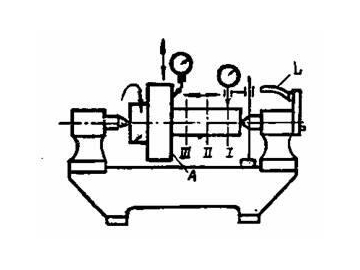
a. Wipe the part clean. Except the one designed with a hole that needs to be installed onto the mandrel, place the part between the tips of deflection instruments and make it to be freely rotatable. But no axial endplay is allowed. Then, tighten the two tailstocks. When you need to dismantle the part, use one hand to hold the part.
b. Install the dial gage, and make the rod pass through and be perpendicular to the shaft axis. The measuring head should touch the parts. Finally, secure the dial gauge stand.
c. Rotate the part that needs testing. Write down the maximum and minimum reading values. The difference between the maximum and minimum values belongs to the radial run-out error value of I-I section.
d. The measurement should be carried out on the three axial sections. The part's circle run-out error value is considered to be the maximum value we get from the three measurements. - Measurement of End Circular Run-out
a. Clamp the lever indicator onto the dial gauge stand of the deflection tester. Then, slowly move the dial gauge stand to make the measuring head touch the end face that needs testing. And preload the correct position of the 0.4mm measuring bar.
b. Rotate the workpiece, and record the maximum and minimum reading values. The difference between the maximum and minimum reading values is the end circular run-out error.
c. On the tested end face, measurements are carried out on the three uniformly distributed positions. The maximum tested value is the end circular run-out error of the part.
