Doctor Blade Holders

Doctor Blade Holders
Request a Quote
Keeping the doctor blade in operating position firmly and facilitating rapid blade changes

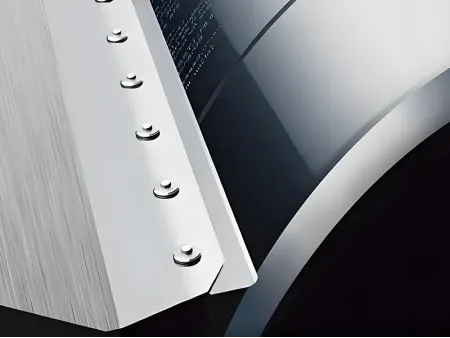
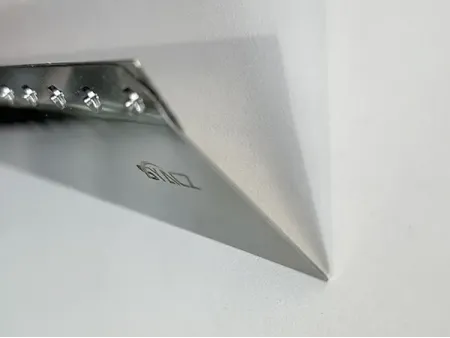
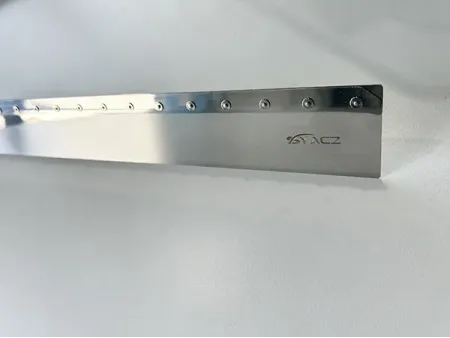
Doctor blade holders are an important component in doctor blade assemblies, providing the structural support needed for stable ink metering and uniform pressure distribution. These holders secure both the doctor blade and back-up blade, ensuring proper alignment and consistent performance throughout the printing process. One of the main advantages of a modular blade holder system is its quick-change capability, allowing the doctor blade to be replaced in just 10 seconds without modifying the existing printing setup. This reduces downtime and operating costs by approximately 50%, making it an efficient solution for high-volume printing. Manufactured from stainless steel, these blade holders feature a multi-rivet structure that enhances durability. With a lifespan of up to 100,000 re-installations, they provide long-term stability and reliability without compromising performance.

Specifications of Blade Holder
  • 40mm×1200mm to 40mm×1800mm
  • 50mm×1200mm to 50mm×1800mm
  • 60mm×1200mm to 60mm×1800mm
Advantages
The doctor blade can be replaced separately, while the back-up blade and holder remain in use for extended periods. This reduces blade consumption and helps cut costs by approximately 30%.
The specially designed stainless-steel holder ensures that the replacement of the doctor blade is fast, minimizing downtime and reducing labor effort.
A uniform blade thickness maintains stable ink removal, ensuring consistent print quality throughout production.
Ensures better ink distribution, achieving superior results for layered graphics and complex print designs.

Note: For optimal performance, the doctor blade holder should be matched with a compatible doctor blade assembly. Standard blade widths range from 8mm to 10mm, with common specifications including 8×0.152mm, 9×0.152mm, 10×0.152mm, and 10×0.102mm. The 10×0.102mm blade is softer and should be paired with a back-up blade (recommended at 8×0.152mm) to maintain stability and extend its service life.

Guidelines for Using Doctor Blade Holders
  • The doctor blade and holder should be positioned at an angle greater than 65° for optimal performance. A doctor blade angle gauge is recommended to ensure proper alignment.
  • When the printing plate width is around 1000mm, the blade pressure should not exceed 0.18MPa to prevent excessive wear.
  • To maintain flexibility, the holder should be removed once a month. Holding both ends, gently move it up and down to ensure that the two sections remain properly aligned and functional.
  • The clamping area must be cleaned monthly. Use the provided small scraper tool to remove residue and apply machine oil.
  • A well-installed blade should achieve:

    Silent ink removal without unnecessary friction.
    No ink leakage around the rivets of the holder.
    Extended blade lifespan with no visible streaks or irregular lines.
Installation Instructions for Modular Doctor Blades
  • Clean the blade holder thoroughly before installation. Ensure there is no residual ink or debris, and smooth out any rough edges.
  • Position the doctor blade holder in the blade clamp and adjust the extension length. Typically, the holder should extend 16-25mm from the clamp, which can be measured using a vernier caliper.
  • Secure the blade holder by tightening the screws, following the same method used for traditional blade installations.
  • Prepare the back-up blade by cutting it 20mm shorter than the printing cylinder length. Trim both ends diagonally and smooth the edges with a file.
  • Insert the back-up blade into the holder, ensuring it is centered for even support.
  • Cut the doctor blade to match the holder length. Trim both ends diagonally and smooth any rough edges with a file.
  • Insert the doctor blade into the holder, aligning one end first. Use a soft cloth to press the blade securely into place.
  • Inspect the installation by gently running a finger along the blade edge. Ensure the blade is smooth, evenly positioned, and free from any damage or waves.
Related products
Send Message
Other Products
Inquiry
Inquiry