Balancing Machine
Request a Quote
Coil Manufacturing Equipment & Technology
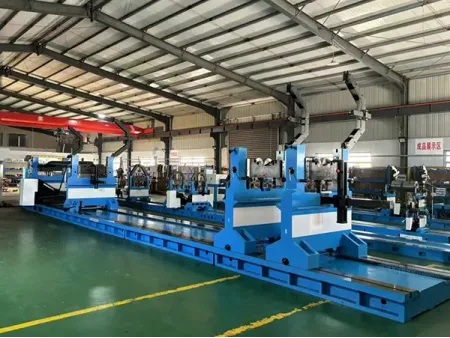
Horizontal balancer for industrial precision measurement
Balancing machine is divided into two parts: the hardware handles the vibration signals and enables the system to be updated in real time; the software completes the calculation, control and realizes other functions. When the workpiece is loaded on the support frame, the belt makes the workpiece to be rotated in a certain way, and the centrifugal force generated by the unbalanced mass will make the support frame vibrate. Left and right vibration sensors convert the vibration signals into electrical signals for input to the electrical measurement system, and photoelectric sensors provide a frequency/phase reference signal for the system.
Key Advantages- The narrow-band tracking filter is responsible for the signal-to-noise separation of the measured signals.
- A/D converter samples, quantizes and inputs the filtered signals (unbalanced signals) into the computer, which also acquires other signals (e.g., system self-test, speed signals).
Features
- Balancing machine performs static and dynamic balancing, with up to 10 supporting methods, and can be flexibly customized for forward and reverse rotation.
- Signal pre-processing utilizes a multi-order integral circuit to suppress noise and improve the signal-to-noise ratio. The programmable amplifier is controlled by computer to change the gain according to the unbalanced signal level.
- It adopts multiple combinations of calibration coefficients and double filtering of hardware and software, which makes the measurement data more accurate.
- The measurement of balance amount and angle unit can be customized, the display precision can also be customized to achieve real-time conversion of units.
- Balancing machine has the function of calibrating the measurement results.
- The interface of sophisticated calibration is specialized and easier to maintain, the calibration coefficients are verified in real time, and the system is equipped with a linear diagram.
- The language and print report language can be selected from Chinese or English.
- Measured values are displayed in the form of digital and vector graphics, all system parameters are prompted with information, including parameter definitions and setting ranges, and the calibration process is guided through the entire process.
- Database storage, rotor data, clamp compensation data record number are no upper limit, and the measurement record is 10,000 cycle records.
- It can automatically record historical measurement values with various recording methods to choose from.
- Balancing machine can measure rotor data such as report, balance report, one-sided measurement report. Note information can be added and displayed in the report.
Specifications
| Maximum workpiece mass | kg | 10-60000 | |
| Maximum workpiece diameter | mm | Ø4000 | |
| Support bearing diameter | mm | Ø90-Ø250 | Ø250-Ø400 |
| Base length | mm | 9000 | |
| Balancing speed | r/min | Variable frequency stepless speed control | |
| Motor power | kW | 3-55 | |
| Electrical test system/control cabinet: industrial computer EDA-708 test system, 17-inch LCD display Power: AC 380V, LCD 17-inch display | |||
| Printer: Hewlett-Packard printer, standard A4 paper size dynamic balancing test report | |||
| Technical Performance | |||
| Minimum achievable residual unbalance amount (emar) | g.mmKg | ≤1 | |
| Unbalance reduction rate | URR | 90% | |
| Gearbox input torque | NW | 650 | |
| Universal joint drive shaft torque | n.m | 2250 | |


